Underskirt Blower motor
replacement;
Horizontal Output
Style.
|
Previous
|
Safety Warnings!
| Remove Power from the spa/hot tub BEFORE performing this
procedure. Failure to comply with this requirement, can lead to
electrical shock and/or electrocution! |
Disclaimer
|
| The
instructions here are intended for general reference only. Many blowers
are different from the one depicted here, and may require more or less
mechanical effort or knowledge in order to achieve the desired
results. |
READ FIRST BEFORE YOU
CONTINUE
|
 |
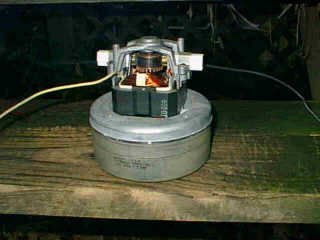 |
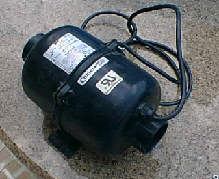
This under-spa skirt mounted
Comet® blower assembly needs the new motor shown
on the right. It's a 1.5HP, 230 Volt model. (To purchase this motor,
click here
.)
|
 |
 |
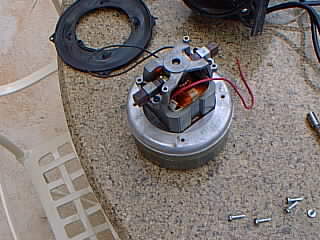
With the new motor, what I usually like to do is put a
small amount of silicone adhesive on the bottom of the fan housing, and re-attach the foam
insulator. Next, on the right, I've slipped over the rubber isolation ring onto the motor,
aligning the 4 screw holes.
|
|
Next thing, is I place the plastic ring over the
motor, (on some this may be a round metal plate), which secures the flow isolator onto the motor.
|
|
 |
|
 |
 |
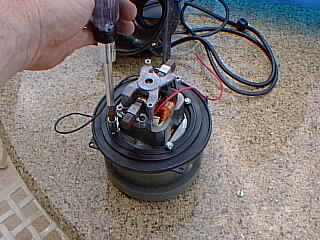
On the left, I'm simply installing the 5/16"
screws into the assembly. On the right, all are completed.
|
 |
|
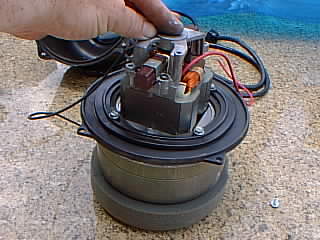
Fairly simple. Re-installing the new assembly
into the blower housing, aligning the housing holes with the rubber flange.
|
|
|
 |
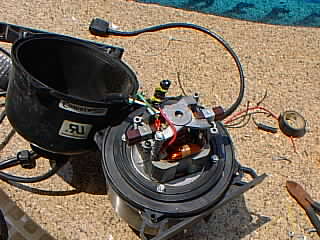 |
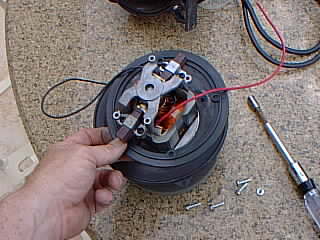
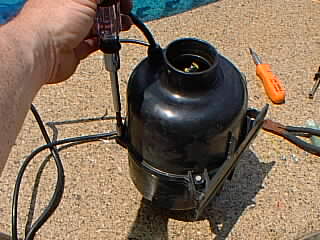
First thing to do is to re-install the ground wire to
the frame of the blower motor. Once that's done, it may be necessary to cut and strip the
excess length of wiring that comes with a new blower motor. Normally, I only need about 8
inches or so to work with. Then, I prefer to use small wire nuts, then tape them up so they
don't spin off, and then use a couple of small nylon tie wrapes to keep the tape from
unravelling. You can see how I've done this in the above right image, where I've used two
yellow tie wraps to secure the taped up wires.
|
 |
|
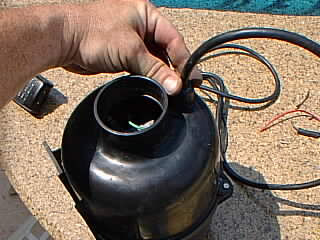
With the wires properly secured, I re-install the
cover, taking care to make sure that the new wiring is not going to contact the armature, and that
there's very little excess wire left in the assembly to bounce around.
|
|
|
 |
 |
|
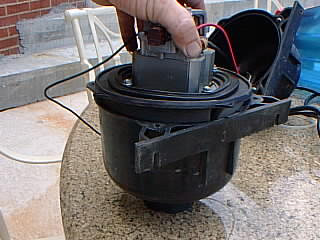
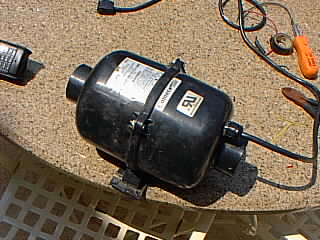
The last thing is to pull out the cord to an
appropriate length, to further prevent the interference of the wiring with the motor, and then
re-attaching the strain relief.
|
|
|
This blower is now finished...
|
|
|
To check out the blowers and blower parts online,
click here for
SpaPartsNet
Blower Components
.
|
|
|